


The Pineapple skirt pattern
The size really depends on the type of material and size of hook you are using. You can vary the size by using a different type of material and size of hook.
The one I made (on the picture) is cca 80cm (32”) long and cca 95cm (38”) around the hips.
You need:
I used 300g – 350g of acrylic yarn (It’s better if you are using yarn with some elastic in it – it’ll give the skirt a nicer form, than 100% cotton. It will make the skirt fit better as well).
Crochet hook 3mm
Yarn Needle
16 little beads (optional)
Terms/Abbreviations: I used US terminology
ch chain
slst slip stitch
sc single crochet
dc double crochet
st stitch
3dctog. 3 dc together
2dctog. 2 dc together
Note: Please read all the instructions first, so you can choose which way you want to make your skirt.
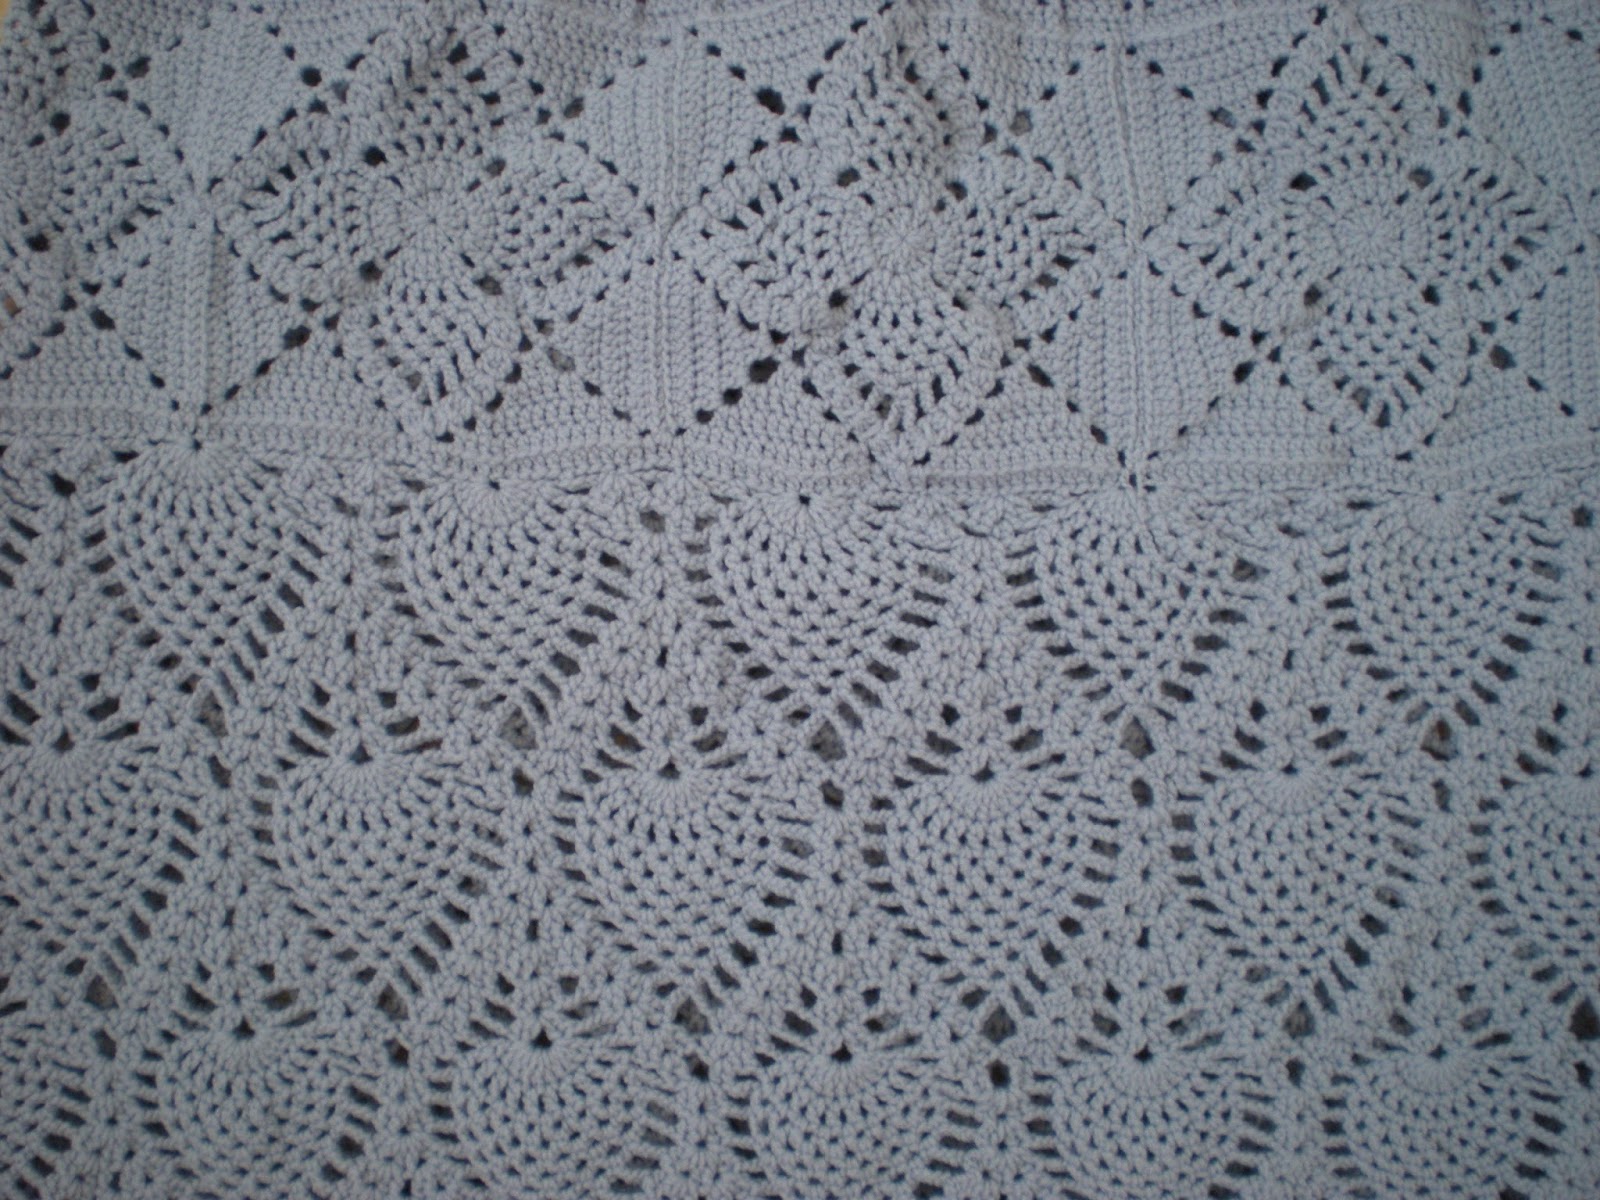
Skirt
At first I made 8 pineapple squares. One square measures cca 12cm (4,8”). See the chart bellow. It is all depending on size of your skirt. The pattern can be use for any even or odd amount of squares.


When I had all the squares I needed, I sewed them together – backstitch only. The other option is to join them together with sc’s if you like. You should end up with sort of circle made out of squares.

Top part of the skirt
Work the top of the skirt in rounds. Do not turn. Slip stitch on end of each round.
I started with the top part of the skirt, but it’s really up to you if you will work the way I did. Use the
“chart no.1” you can see above, how to make the top of the skirt. After row 1 following this chart you should have 280 dc’s around. And just keep following the chart. Fasten of. Weave the ends.


Lower part of the skirt
Work the lower part of the skirt in rounds as well. Do not turn. Slip stitch on end of each round. Use slip stitch on end of each round to get where you need to be to start next round. Start with row/round of dc’c same as with the top of the skirt – 280dc’s – backstitch only. The pineapple pattern is repeating every 20 stitches. You should end up with 14 pineapple motives. To start, follow row/round 1 and 2 from the
“chart no. 2” you can see below. After finishing row 2 work rows/rounds 3 – 10 from “chart no.3” below. Afterwards repeat rounds 1-10 from “chart no.3” as many times as needed to obtain the length of the skirt you desire. Finish your work on lower part of the skirt with round 6 of the “chart no.3” – you should have 14 unfinished pineapple motives. Fasten of. Weave the ends.


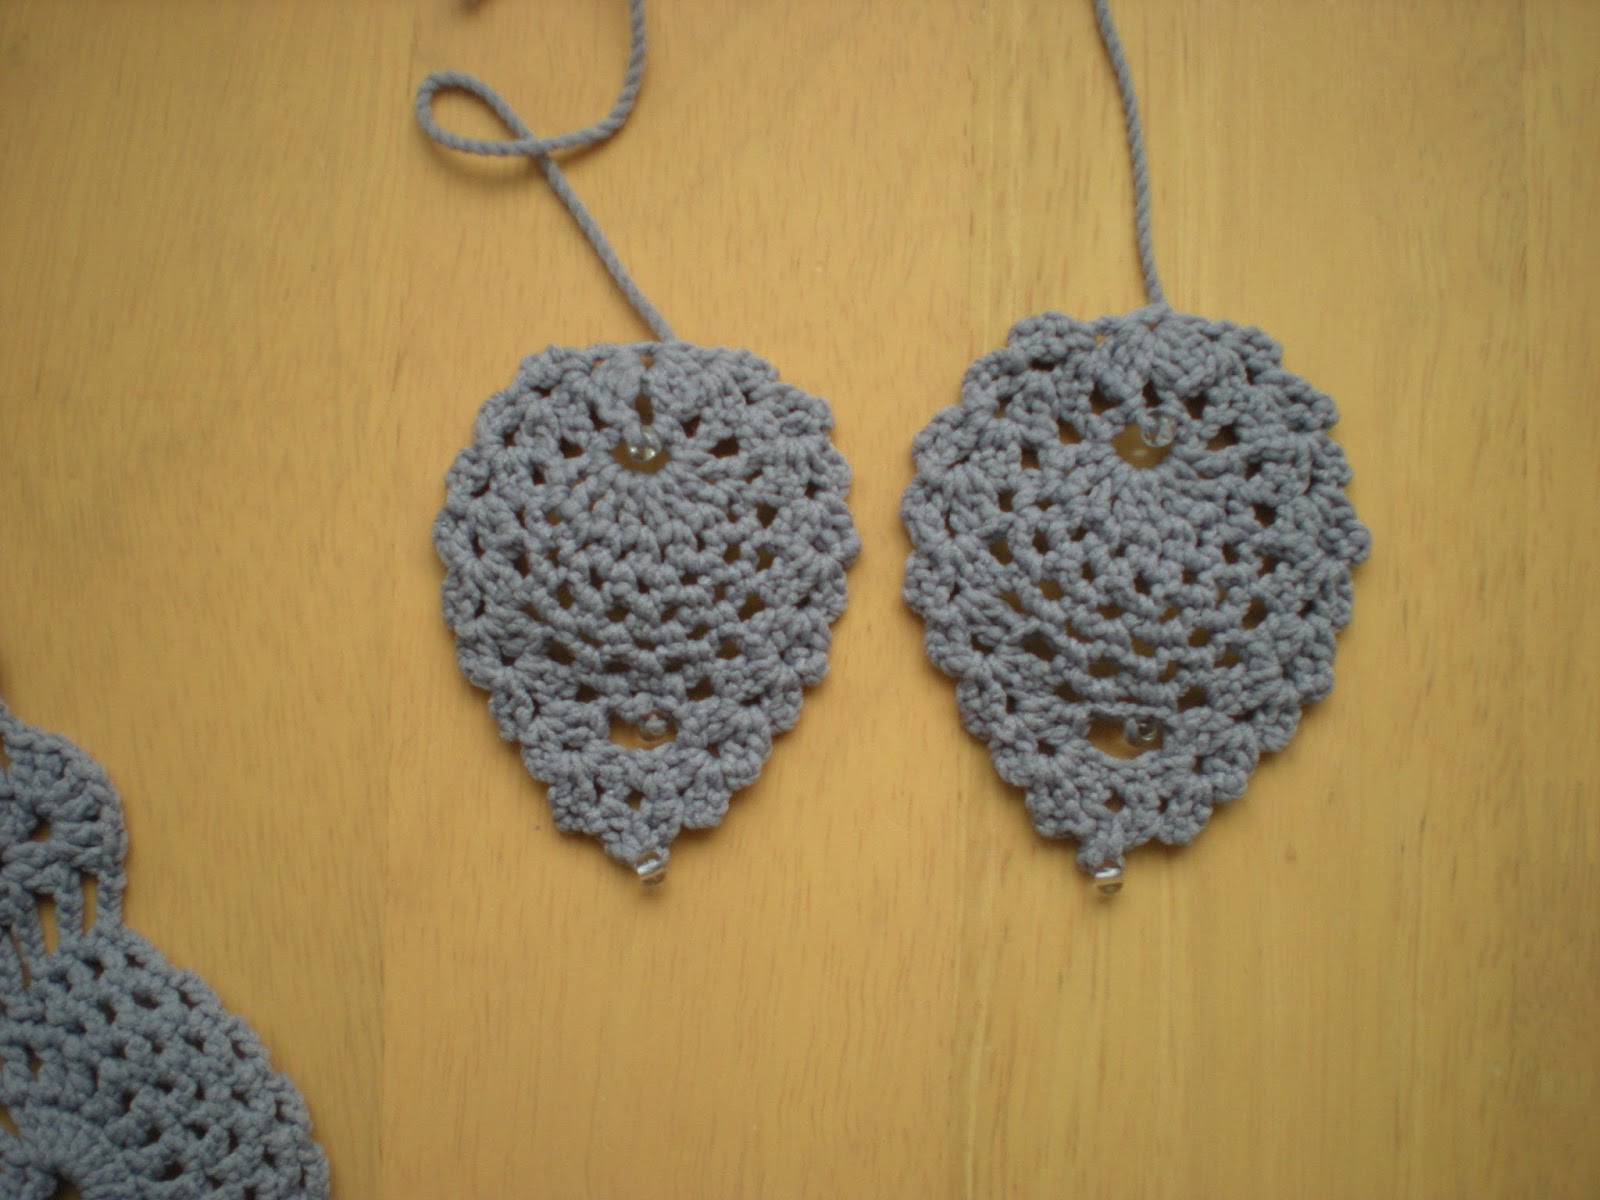
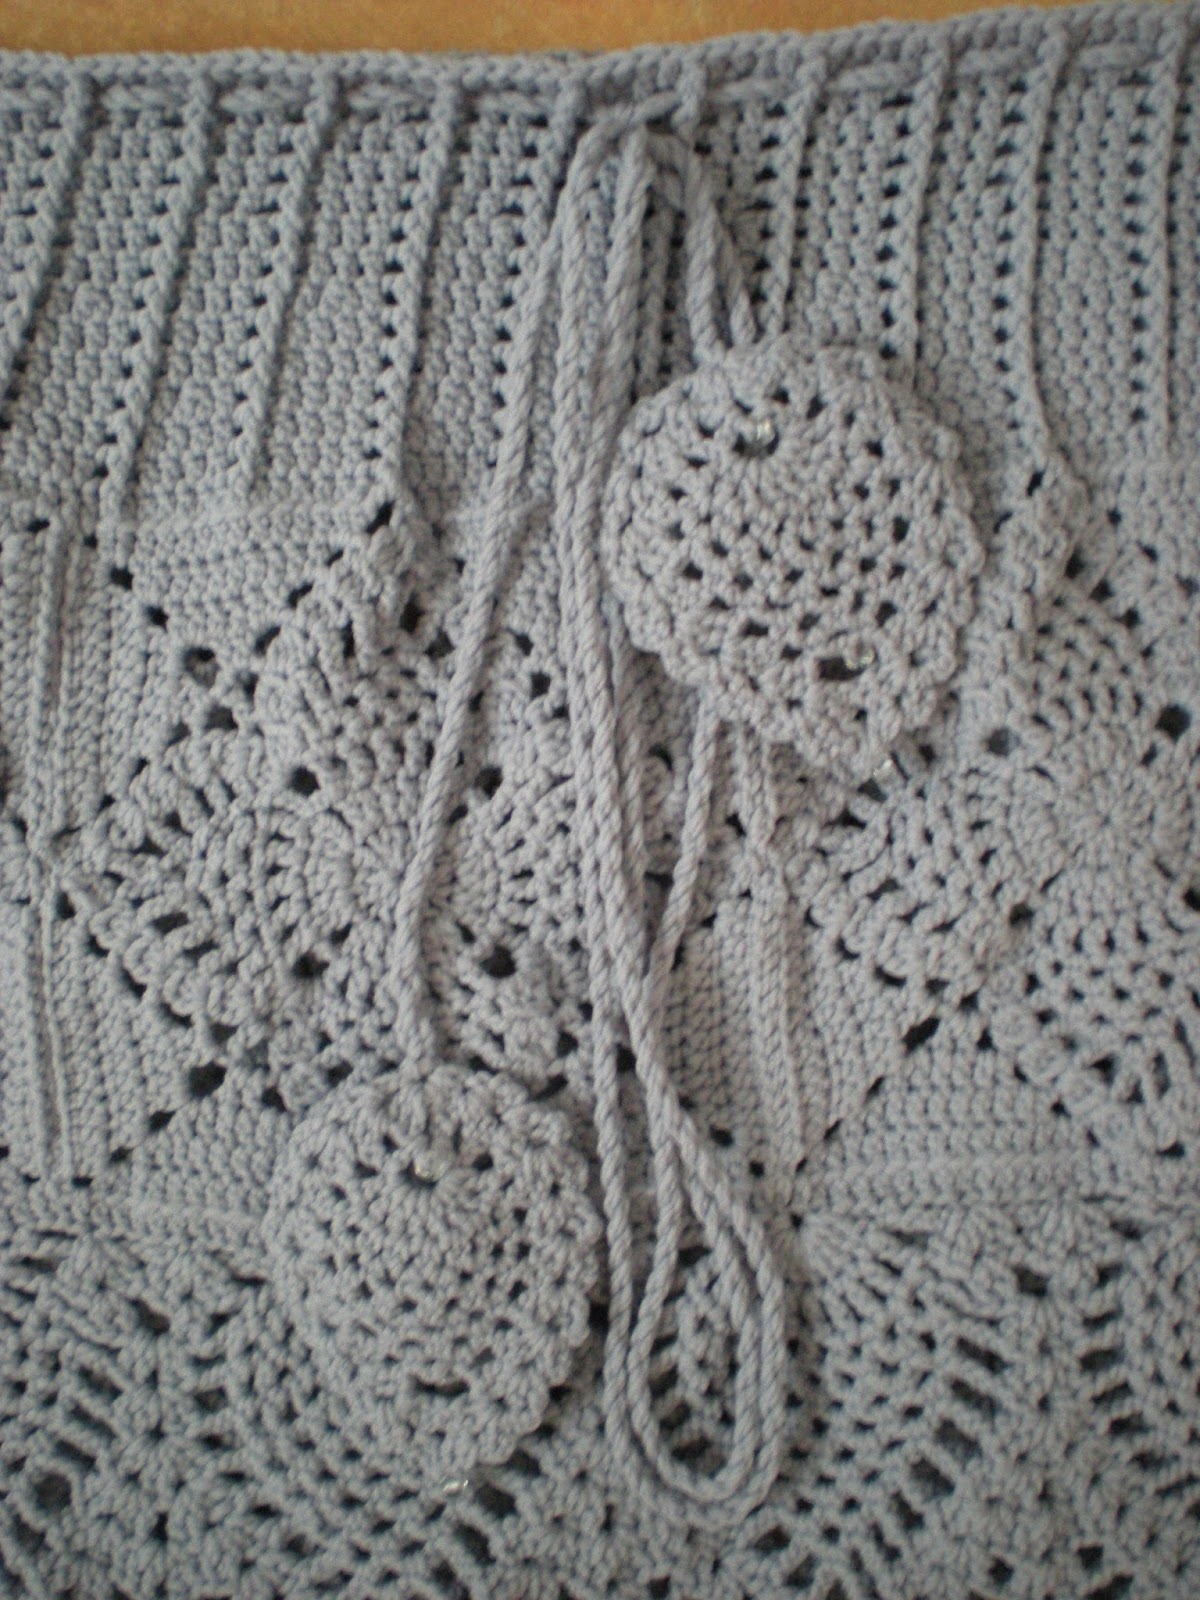
Lower edge of the skirt
Now we are going to be finishing the pineapple motives. Start each pineapple motive from the right side of the skirt/work. From now on you’ll be turning your work back and forth on the end of each round!!!!
Follow the “chart no.4” above. Start with round 7.
As you can see on the pictures I added a little bead on end of each pineapple. That is optional.


Drawstring through the top of the skirt
I just thought it would look nice to put a drawstring with pineapples through the top of my skirt. It can be used to hold the skirt up if needed as well. To do it, I used the pattern for earrings you can find here.


There it is. You should have nice skirt now, or an inspiration for one at least.
To my knowledge this is as best way I can explain how to make this pineapple skirt.
I hope you can understand me, however if you come up with any problems or difficulties, write to me, and I’ll be more than happy to help, or explain further.
Have a nice week
Clara